Access control is one of the most important features ever software users thrive for. An insurance broker is no different. If you are an aggressive insurance professional, you have to gain complete control of what and how your in-house broking activities are performed. If you compromise on this X-factor, then you may severely suffer in succeeding in your business goals. That’s why Sibro insurance broking software offers you complete control over who, what, and when you see your clients, policies, and all other information in the software.
Yeah!! You heard that right!!
User privileges in Sibro insurance software will let you manage which information and what privilege you want to assign to your software co-users provided if you are the administrator of the software. This article will guide you on how you can completely master Sibro’s user permission settings for a full-fledged user experience, safety, and access control.
The Sibro Admin Console

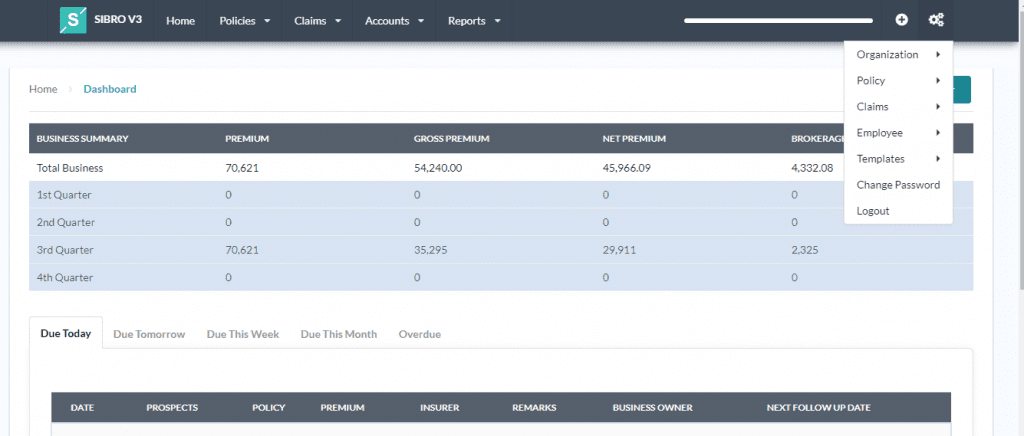
Sibro admin settings give the admin insights about how they can set up the software depends on their organization’s requirements and processes. If you are a Sibro admin, you can access the admin settings by clicking the “Settings” icon on the top right corner. Here you will have different masters such as Organization, Policies, Claims, Employees, Templates, Change password and Logout options.
If you do not have admin access, then you will only be seeing the Change Password and Logout options.
Where can I manage user permissions?
To manage employee permissions, you have be an admin first. Go to the Admin settings → Employee → Employee Master.

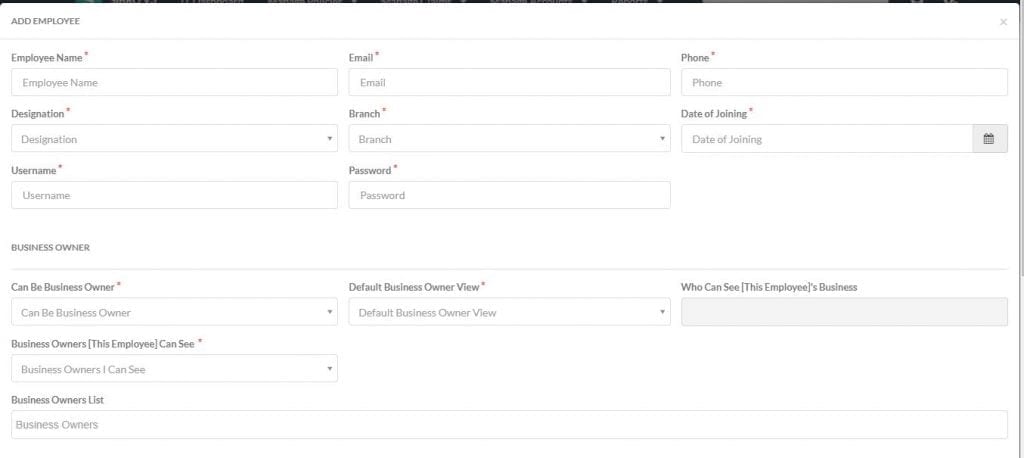
Here you can view all the employees that you added to the software (if any). You can manage employee user permissions of the existing employees and also the new employees that you are about to add. Click on the Add New Employee button and scroll down to the bottom of the page. Here you can see the employee user privilege settings.
What all are the user privileges available with Sibro?
Everything you see throughout the software is user privilege controlled. There are five types of user privileges with Sibro.

- All in Company: For the head of the company and for those who have the privilege to see the entire company data.
- All in Branch: For branch heads, who should see only his/her branch data.
- Select Branches: For regional heads who should see some particular branch data but not everything.
- Select Business Owners in Company: Best suited for team leaders, who should see the business of some selected users in the company only.
- Self: For users who should see only their business..
How can I set privileges employee privileges in Sibro?
You can set privileges in the following sections by checking/unchecking the subsections. In Policies section, you can set privileges for Summary, Upcoming, Converted, Installments, Brokerage, Update etc. Delete claims can be assigned from here. In Claims section, you can set privileges for various class of policies like Annuity, Engineering, Fire, Health, Liability, Life, Marine Cargo, Marine Hull, Misc, Motor, Pension, Term etc. Delete claims can be assigned from here.
You can also set privileges for Accounts, Reports, Masters, Bulk Download, Client Accounts Edit, Other Document Privilege, Daily Email Summary etc.
SIBRO offers more than you THINK!
We waited until we could do it right. Then we did! Checkout the incredible features of Sibro, the best software for insurance broking companies in India, Philippines and Botswana.
SEE ALL SIBRO FEATURES
Best Insurance CRM Software for Brokers
