The claims module helps you track the status of every claim that arrives from our customers easily and systematically. It also tracks the TAT of every claim. You can attach and keep all the documents that your client shares. If there is any shortfall, you can inform them directly from the software. Now, let’s move deeper.
In dashboard, click on ‘Claims’ and you will find three sections; Health, Motor, and All (Both health and motor claims).
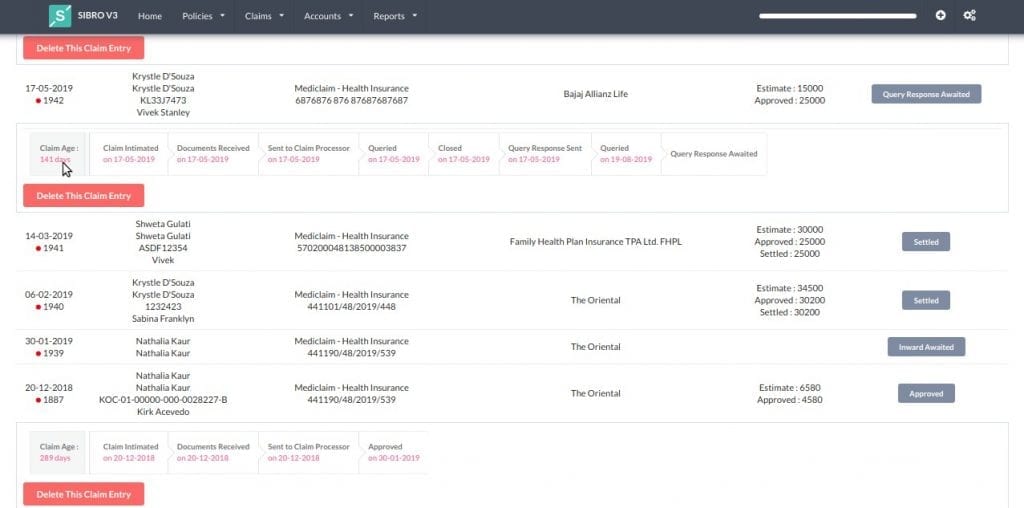
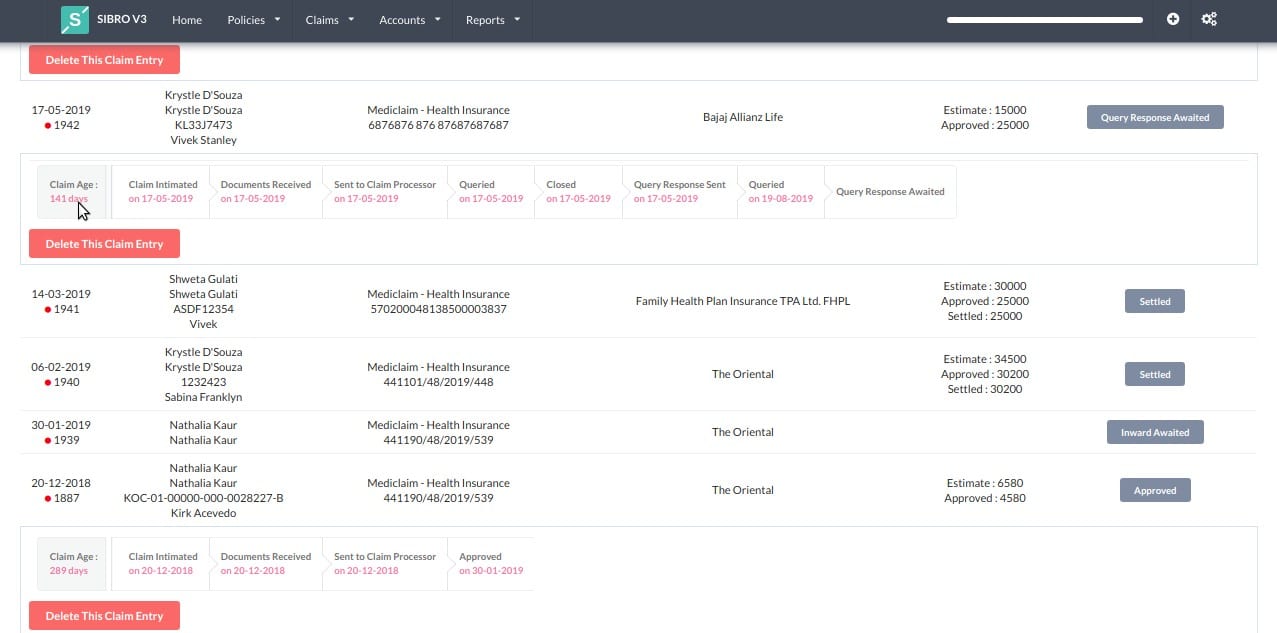
Click on ‘Health’ and the software will list out all the pending claims and their current statuses. When you click on any row, it will expand further and show at what stage the claim is. You can click on every stage and make changes to it right away.
Intimation
Firstly, we have to inform the claim processors that the accidental event has occurred which is known as ‘Claim Intimation.’ Meanwhile record the intimation in software to keep track of it. In some cases, this intimation step is optional because your client would have directly informed the claim processors. + → Add Claim → Intimation. Here, select your client name from the drop down and the policy name, claim processor, and claimant name will be auto filled. Select the intimation date and save.

That’s it. You’ve added a claim and now the software will denote this stage as ‘Inward Awaited’ stage. Inward Awaited means you are waiting for the documents to arrive.

Inward
Once the documents are arrived at your desk, you can save the details as shown below. + → Add Claim → Inward. As you start filling out the required details, the software will auto fill other data. Drag it little down and you will find a checklist..
Document Checklist
This document checklist ensures you of any shortfall. You can tick the boxes with the documents you have received. You can also edit this document checklist.

How to edit document checklist?
Go to, Settings → Policy Master. You will find various class of policies. Click on the policy name and it will expand further. There you can add or remove based on your requirements. Back to Inward stage. Once done with the checklist, you can fill the claim documents received date and mode of receipt (by hand or courier or post or mail). It’s optional to add the surveyor and receiver’s name but doing this could help in future actions. Save. ‘Inward Awaited’ stage will be changed to ‘Documents Received’ stage. The next step is to send the documents to claim processor, i.e., Outward.
Outward
Once you have sent the documents to claim processor, note it down in the system.
+ → Add Claim → Outward. Fill out the Outward date and you will find so many prefilled details. Check it and save. Now, the current stage changes from ‘Sent to Claim Processor’ to ‘Claim Processing Awaited.’ The response from claim processors can be any of these - Approved, Repudiated, Queried.


Settled
The claim processor has approved the claim and will settle the payment immediately. So, you can mention it as ‘Settled.’ Sometimes, it might take a few days to settle. In such cases, mark it as ‘Approved.’ For instance, when a customer enquiries that he didn’t receive the payment yet, we can confirm that they have approved the claim and ask him to wait..
Repudiated
The claim processor may reject the claim due to various reasons. You can save the status as ‘Repudiated’ with the date and reason for it.


Design
Queried
Due to shortfall or other reasons, the claim processor may send a query which is displayed as ‘Query’ stage. Click on that ‘Queried’ and you can save the queried date and details. You can remind the clients by sending mail directly from the query stage. You can add follow up notes too. When the client sends the documents, the ‘Queried’ stage will be moved to ‘Queried Response Sent’ stage. Next, they might approve the claim or send a query again. If the client doesn’t send the documents, the claim processor would close the claim. This stage is known as ‘Closed.’ You can mark the claim as closed. When the client responds to the query, you can reopen the claim and send the documents to the claim processor.
Now, the stage will be mentioned as ‘Query Response Awaited.’ The claim processor might approve or reject the claim eventually.
Design
TPA Management
As Sibro is connected to TPAs (Third Party Administrator), the system will match your claims list with all TPAs. If the claim matches with the TPA list, it will turn green; otherwise it will be red. You can see the colors in every claim row. Thus, Sibro makes the claim process much easier.


Claims Dump
If the TPA has given you login credentials of their system, you can download the claim details and upload it in your software. You can upload the TPA’s client details as follows.
+ → Add Claim → Outward
Select the claims processor and you will find a spreadsheet template. You can start uploading. Import.
SIBRO offers more than you THINK!
We waited until we could do it right. Then we did! Checkout the incredible features of Sibro, the best insurance claims management software in India, Philippines and Botswana.
SEE ALL SIBRO FEATURES
Best Insurance CRM Software for Brokers